Installing KALI in container
KALI is a popular name in the world of IT, where it is used for penetration and security testing. It contains a massive packages of tools gathered into KALI.
There is multiple ways to install an operating system, and I would like to add this as a virtual host on my server. As KALI linux is Debian based, I’m going to install it on an LXC host on my ProxMox server.

ProxMox is easy to install and use, it is fast and got a lot of features that even ESXi servers can’t compare against. ProxMox can create host as VM or LXC, the LXC is nice, as we can save resources when adding linux-hosts. It also do support console, QEMU and KVM through the web-based interface, so you will be able to use or test applications with GUI without needing to setup any remote connections.
Overview
- System: ProxMox 5.3
- Type: Container/LXC
- OS: Debian 9.7(template)
- CPU: 1(unlimited thread)
- RAM: 2GB(1.5GB swap)
- KALI-PACK: kali-linux-all
- Time to install: approx. 5h (installing and update debian, ~2.5h / installing KALI from REPO, ~2.5h)
Creating DEBIAN in LXC
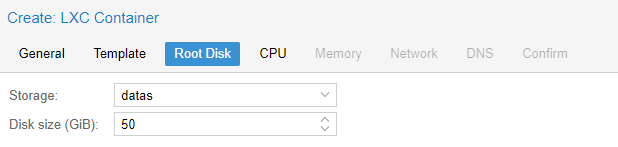
Creating the LXC is simple, you start by clicking the Create LXC on the top right and type in the hostname, password and ticks off that it is an unprivileged container. You are then going to set what template, how large the root disk going to be, reserving CPU and memory, setting up the NIC and sets the DNS.
I’ll follow the guide from the course by adding 2xNIC. 2GB of RAM(and 1.5GB of swap, just in case..) and a 50GB disk.
After I’ve added the extra NIC after creating the LXC-host, I ran into trouble to logon, that’s because root user are not allowed to logon remotely. I’ll then need to logon to my LXC through the proxmox and add a new user. Renember, you need to have root access to do it this way, but you could also use the console through the web-interface.
vi3t@ticaprox:~$ lxc-attach 103
lxc-attach: 103: tools/lxc_attach.c: main: 313 You lack access to /home/vi3t/.local/share/lxc
vi3t@ticaprox:~$ sudo lxc-attach 103
[sudo] password for vi3t:
root@ticali:/#
root@ticali:/# adduser vi3t
perl: warning: Setting locale failed.
perl: warning: Please check that your locale settings:
        LANGUAGE = (unset),
        LC_ALL = (unset),
        LANG = "en_US.UTF-8"
    are supported and installed on your system.
perl: warning: Falling back to the standard locale ("C").
Adding user `vi3t' ...
Adding new group `vi3t' (1000) ...
Adding new user `vi3t' (1000) with group `vi3t' ...
Creating home directory `/home/vi3t' ...
Copying files from `/etc/skel' ...
Enter new UNIX password:
Retype new UNIX password:
passwd: password updated successfully
Changing the user information for vi3t
Enter the new value, or press ENTER for the default
        Full Name []:
        Room Number []:
        Work Phone []:
        Home Phone []:
        Other []:
Is the information correct? [Y/n] Y
root@ticali:/#
When the user is added, you should be adding the user to the sudo group. The command sudo is used to gain root access with the specific command you are running.
*sudo* (/ˈsuːduː/ or /ˈsuːdoʊ/) is a program for Unix-like computer operating systems
that allows users to run programs with the security privileges of another user, by
default the superuser. It originally stood for "superuser do" as the older versions
of *sudo* were designed to run commands only as the superuser.
This Debian template didn’t have the sudo preinstalled, so we will be updating the system, upgrade and install the sudo. After that, we will be adding user to the sudo group.
TL;DR
apt update && apt -y upgrade && apt install sudo
usermod -aG sudo vi3t
Confirm with these commands.
root@ticali:~# usermod -aG sudo vi3t
root@ticali:~# id vi3t
uid=1000(vi3t) gid=1000(vi3t) groups=1000(vi3t),27(sudo)
SSH to the host and test the sudo command.
vi3t@ticali:~$ sudo uname -a

We trust you have received the usual lecture from the local System
Administrator. It usually boils down to these three things:

    #1) Respect the privacy of others.
    #2) Think before you type.
    #3) With great power comes great responsibility.

[sudo] password for vi3t:
Linux ticali 5.3.18-2-pve #1 SMP PVE 5.3.18-2 (Sat, 15 Feb 2020 15:11:52 +0100) x86_64 GNU/Linux
vi3t@ticali:~$
Installing KALI
KALI is not an operating system in itself, but it is a collection of tools that is gathered/bundled in under one operating system. We can use other OS then Debian to install these tools in, but since Kali have been using debian Kernel from a while ago, I feel more convenient to use Debian.
To install these tools, KALI have their own REPO, linked at http://http.kali.org/kali. We will be adding this to aptitude to be able to install packages from this REPO.
vi3t@ticali:~$ echo "deb http://http.kali.org/kali kali-rolling main contrib non-free" | sudo tee -a /etc/apt/sources.list
vi3t@ticali:~$ sudo apt -y update
...
If you are getting GPG or dirmngr error, you need to install the key(remember to change the key to the one in the error) or application first. If you got dirmngr, install this before adding GPG, as it depends on dirmngr.
W: GPG error: http://kali.download/kali kali-rolling InRelease: The following signatures couldn't be verified because the public key is not available: NO_PUBKEY ED444FF07D8D0BF6

gpg: keyserver receive failed: No dirmngr

vi3t@ticali:~$ sudo apt install dirmngr
...

vi3t@ticali:~$ gpg --keyserver pgpkeys.mit.edu --recv-key  ED444FF07D8D0BF6
gpg: key ED444FF07D8D0BF6: 3 duplicate signatures removed
gpg: key ED444FF07D8D0BF6: 189 signatures not checked due to missing keys
gpg: /home/vi3t/.gnupg/trustdb.gpg: trustdb created
gpg: key ED444FF07D8D0BF6: public key "Kali Linux Repository <devel@kali.org>" imported
gpg: no ultimately trusted keys found
gpg: Total number processed: 1
gpg:               imported: 1

vi3t@ticali:~$ gpg -a --export ED444FF07D8D0BF6 | sudo apt-key add -
OK
Searching through the REPO, you got different packages for your purpose. I’ll be installing the kali-linux-all since I want a full system with all KALI tools. If you are going with the default setup, offering in the ISO-image, you can use kali-linux-full. You can check on KALI METAPACKAGES for further details.
Before installing the packages, we need to fully update and upgrade the system toward the KALI REPO and make a reboot to use the new kernel. In the update, there is some interactive for user to give inputs.
vi3t@ticali:~$ apt update && apt -y upgrade
vi3t@ticali:~$ reboot
After reboot, you will see that we are now using kali-rolling.
vi3t@ticali:~$ cat /etc/debian_version
kali-rolling

vi3t@ticali:~$ apt-cache search kali-linux
kali-linux - Transitional package for kali-linux-core
kali-linux-all - Transitional package for kali-linux-everything
kali-linux-arm - Kali Linux ARM system
kali-linux-core - Kali Linux base system
kali-linux-default - Kali Linux default system
kali-linux-everything - Everything in Kali Linux
kali-linux-forensics - Transitional package for kali-tools-forensics
kali-linux-full - Transitional package for kali-linux-large
kali-linux-gpu - Transitional package for kali-tools-gpu
kali-linux-large - Kali Linux large system
kali-linux-light - Kali Linux light tools
kali-linux-nethunter - Kali Linux NetHunter tools
kali-linux-pwtools - Transitional package for kali-tools-passwords
kali-linux-rfid - Transitional package for kali-tools-rfid
kali-linux-sdr - Transitional package for kali-tools-sdr
kali-linux-top10 - Transitional package for kali-tools-top10
kali-linux-voip - Transitional package for kali-tools-voip
kali-linux-web - Transitional package for kali-tools-web
kali-linux-wireless - Transitional package for kali-tools-wireless

vi3t@ticali:~$ sudo apt -y install kali-linux-all
...
Depends on the REPO and your capacity, the installation will take approx 2,5 hours. It is adviceable to have the terminal on in case of interactions, or install with screen/tmux to get back to it if needed.
Extras
Under installation, I got through some issues with wrong set of locale and a sudo bug.
TL;DR for setting the locale
 sudo vim /etc/locale.gen # Add your language, I've added en_US.UTF8
 sudo locale-gen # adding to the locale
 sudo vim /etc/default/locale # add as default for all logins
Sudo bug
Error message:
sudo: setrlimit(RLIMIT_CORE): Operation not permitted
This bug has been reported to github on sudo page, reference #42
Release 1.8.31p1 solved this issue.
What's new in Sudo 1.8.31p1

 * Sudo once again ignores a failure to restore the RLIMIT_CORE
   resource limit, as it did prior to version 1.8.29.  Linux
   containers don't allow RLIMIT_CORE to be set back to RLIM_INFINITY
   if we set the limit to zero, even for root, which resulted in a
   warning from sudo.
According to the bug on Redhat, you could ignore the message as a workaround, since the sudo still works.
vi3t@ticali:~$ cat /etc/sudo.conf
set disable_coredump false
Containering bug
By updating the systems, the debian version files was set as kali-rolling. It seems to me that the ProxMox doesn’t support the operating system version that is set. In advisor from their forum, we need to set the version in /etc/debian_version. This solved the problem by setting the version till 9.7.
Error message:
Job for pve-container@103.service failed because the control process exited with error code.
See "systemctl status pve-container@103.service" and "journalctl -xe" for details.
TASK ERROR: command 'systemctl start pve-container@103' failed: exit code 1
Troubleshooting
Accessing the journal, it only shows that the container didn’t start because of some error. Starting the container from the CLI as foreground process and logging all the error, I get the following log with command root@ticaprox:~# lxc-start -o lxc-start.log -lDEBUG -F -n 103
Output of lxc-start.log
lxc-start 103 20200321111437.718 INFO     conf - conf.c:run_script_argv:372 - Executing script "/usr/share/lxc/hooks/lxc-pve-prestart-hook" for container "103", config section "lxc"
lxc-start 103 20200321111438.366 DEBUG    conf - conf.c:run_buffer:340 - Script exec /usr/share/lxc/hooks/lxc-pve-prestart-hook 103 lxc pre-start produced output: unable to parse version info 'kali-rolling'

lxc-start 103 20200321111438.433 ERROR    conf - conf.c:run_buffer:352 - Script exited with status 25
lxc-start 103 20200321111438.434 ERROR    start - start.c:lxc_init:897 - Failed to run lxc.hook.pre-start for container "103"
lxc-start 103 20200321111438.434 ERROR    start - start.c:__lxc_start:2032 - Failed to initialize container "103"
Output of debian_version
root@ticaprox:/pvezfs/subvol-103-disk-0/etc# cat debian_version
kali-rolling
Debian version check
vi3t@ticali:~$ cat /etc/os-release
PRETTY_NAME="Kali GNU/Linux Rolling"
NAME="Kali GNU/Linux"
ID=kali
VERSION="2020.1"
VERSION_ID="2020.1"
VERSION_CODENAME="kali-rolling"
ID_LIKE=debian
ANSI_COLOR="1;31"
HOME_URL="https://www.kali.org/"
SUPPORT_URL="https://forums.kali.org/"
BUG_REPORT_URL="https://bugs.kali.org/"
vi3t@ticali:~$ hostnamectl
   Static hostname: ticali
         Icon name: computer-container
           Chassis: container
        Machine ID: cf74d7eb2f3249c3bf2fcd3ee04c2b09
           Boot ID: 685e0bb01c2e4b5090192584b710f06c
    Virtualization: lxc
  Operating System: Kali GNU/Linux Rolling
            Kernel: Linux 5.3.18-2-pve
      Architecture: x86-64
vi3t@ticali:~$ cat /etc/debian_version
9.7
vi3t@ticali:~$ uname -a
Linux ticali 5.3.18-2-pve #1 SMP PVE 5.3.18-2 (Sat, 15 Feb 2020 15:11:52 +0100) x86_64 GNU/Linux